DIY Converting Transformers Bumblebee Costume
I’ve been seeing a few DIY converting Transformers Bumblebee costumes around the internet for a while now. Recently my son has been obsessed with Bumblebee from Transformers and while there’s always the option of buying the transforming Bumblebee costume, I decided to attempt to make the costume for him. I’m happy to report that my attempt ended up looking pretty decent. I did make the costume on the fly and eyeballed everything so there are no measurements. So this is going to be less of a tutorial and more of a guide if you want to make a DIY converting Transformers Bumblebee costume of your own.
DIY Converting Transformers Bumblebee Costume
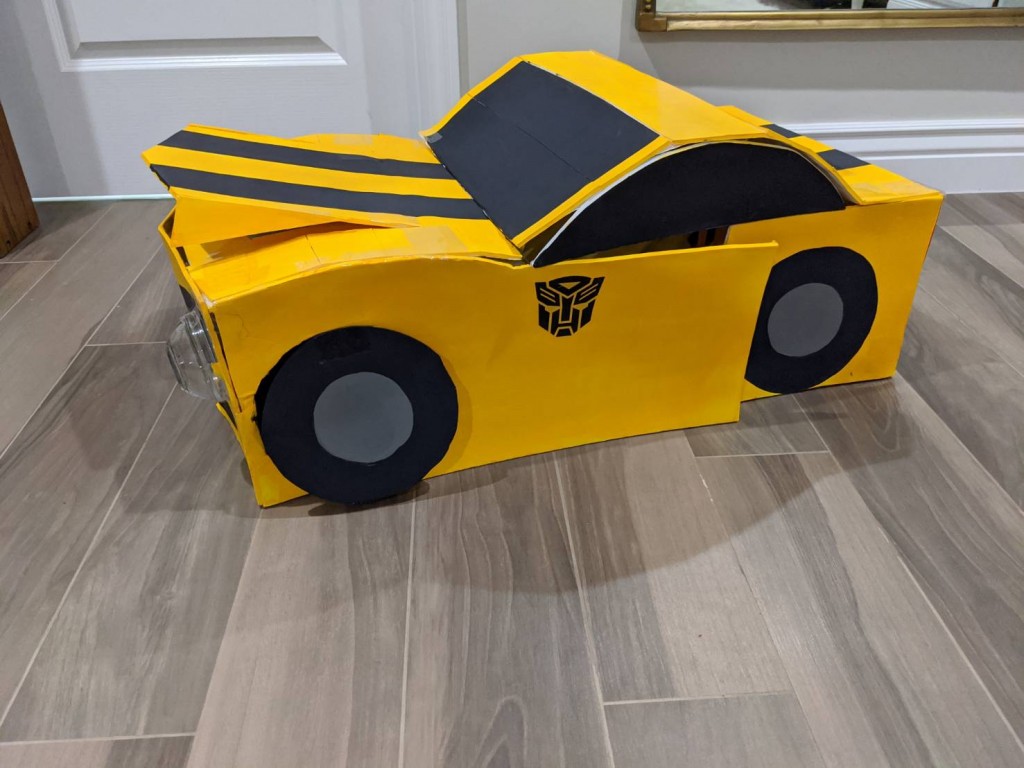
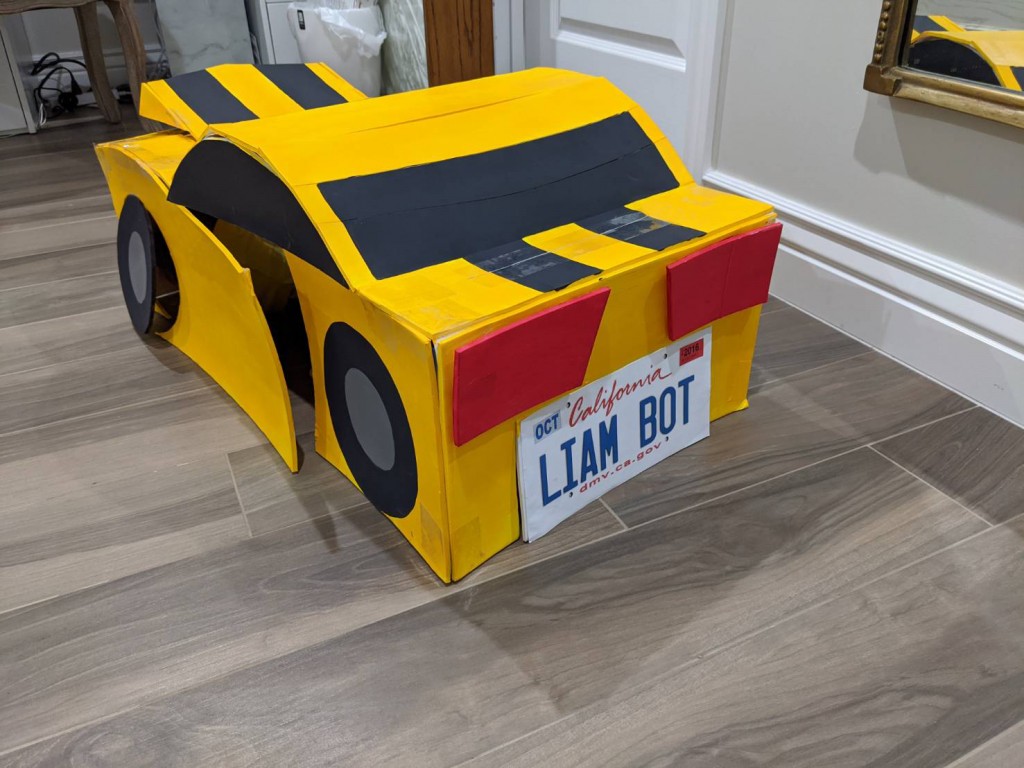
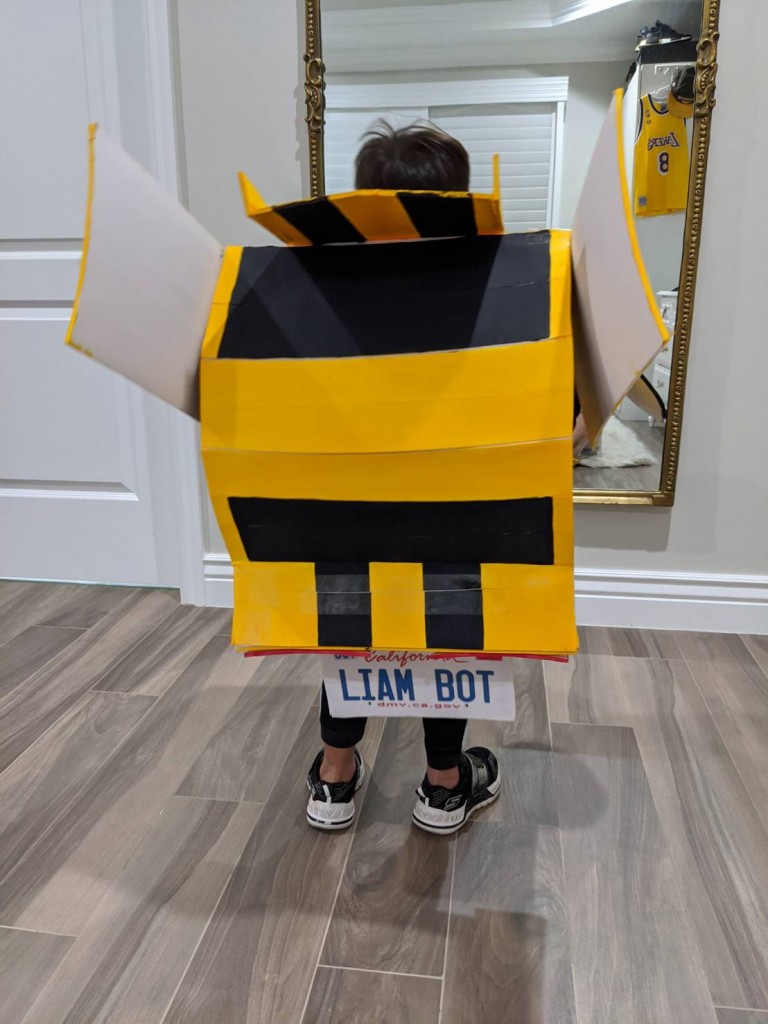
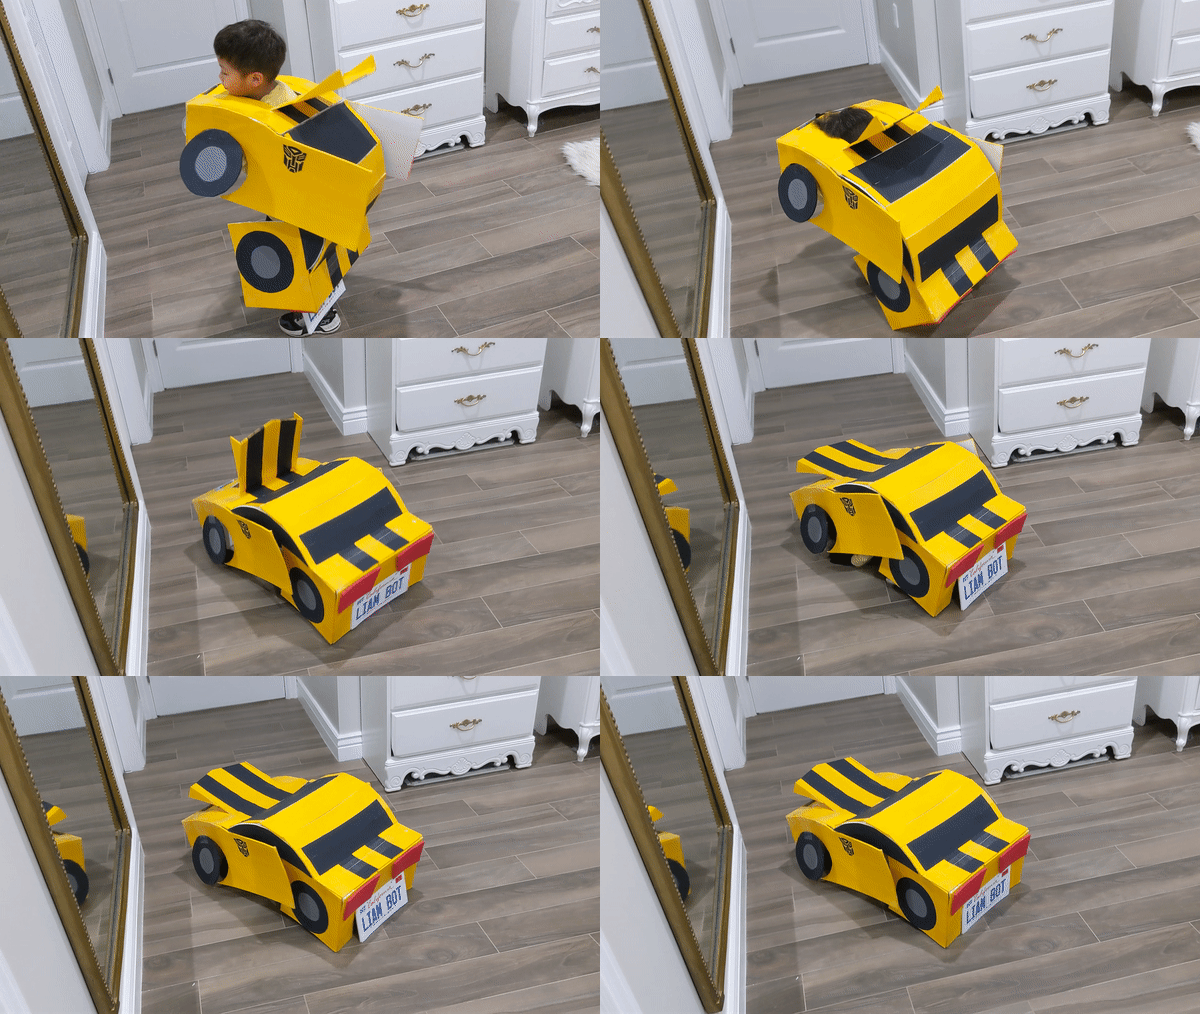
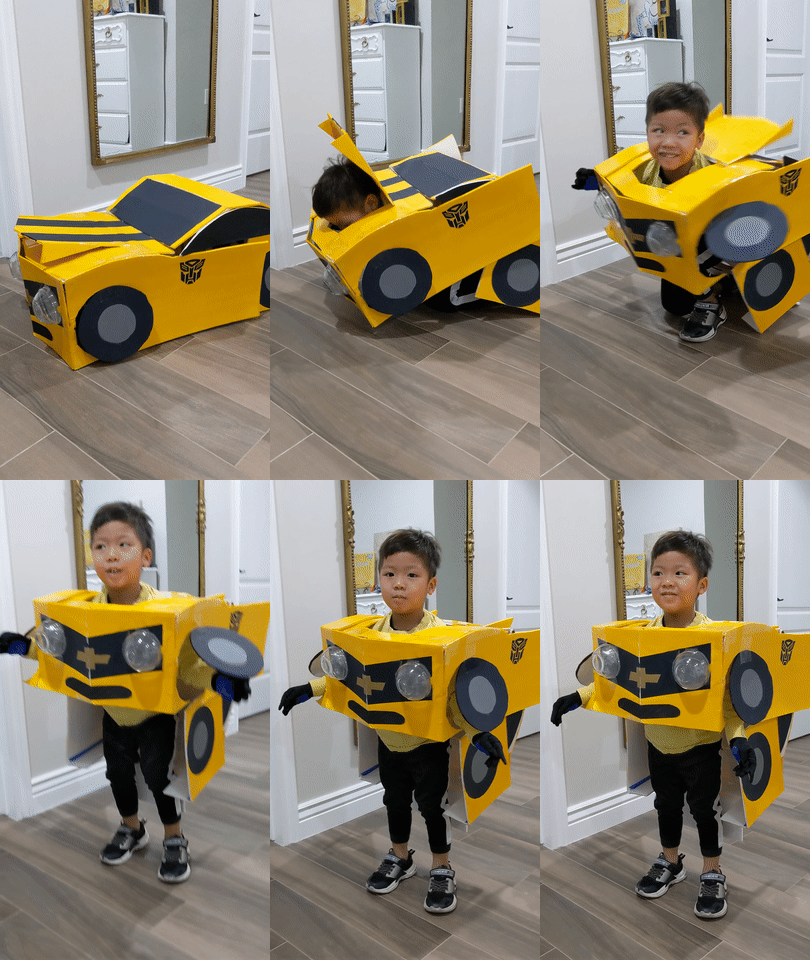
First thing’s first, let’s take a look at my completed DIY Converting Transformers Bumblebee Costume.
Guide
Understand the Costume
To start off, I think you should definitely familiarize yourself with the costume. Understand all the pieces, how the costume moves, which pieces are permanently connected, which pieces swing, and which pieces should not be connected at all. I feel this step is really important so you don’t get confused along the way. I watched a ton of videos and looked at a lot of pictures of transforming costumes. Ultimately, this YouTube video from a channel called “I Am Bentley” is the one I based my costume off of.
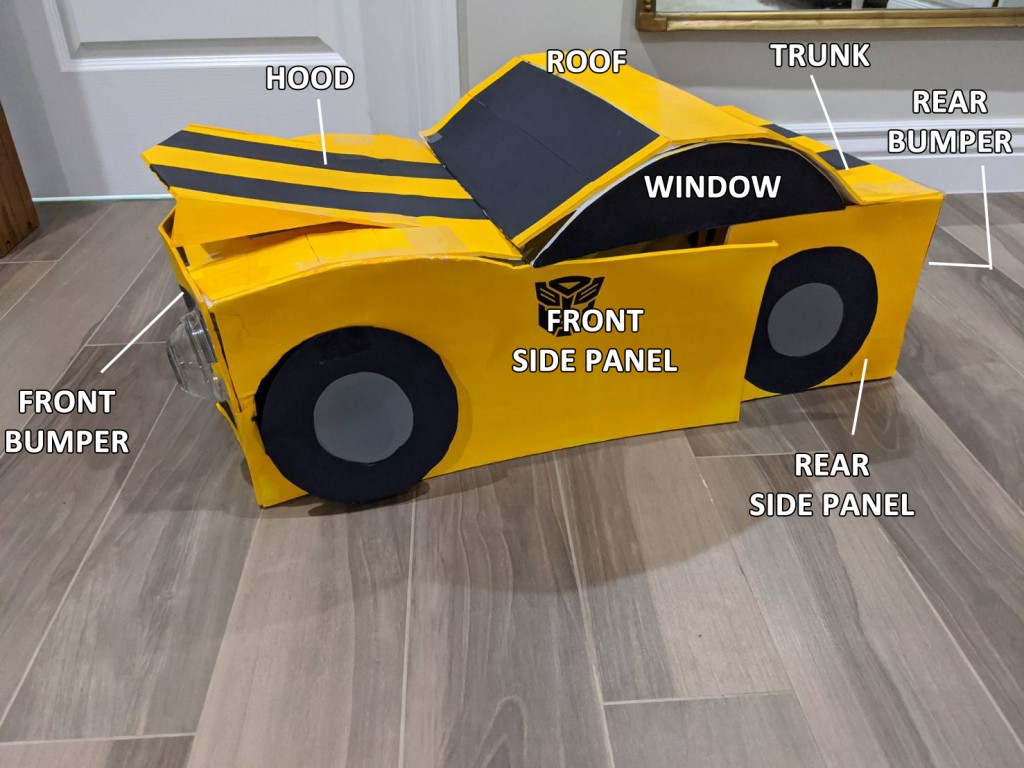
Here I’ll point out all the pieces of the car and label each piece so it will make more sense going forward.
Materials
- Foam boards (4 pieces)
- Box cutter
- Tape
- Ruler
- Pencil
- Glue
- Paint
- Paint brushes
- Headlights (I used two small bowls. You can use round tap lights, coasters, anything at all that’s heavy enough.)
Front Side Panels
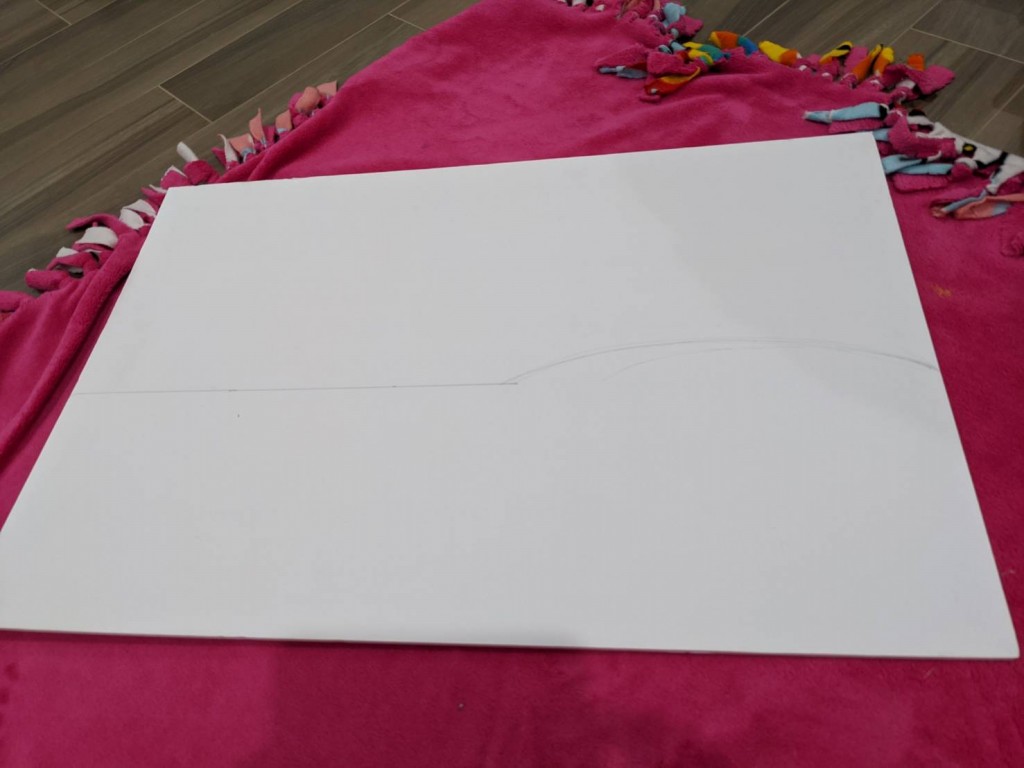
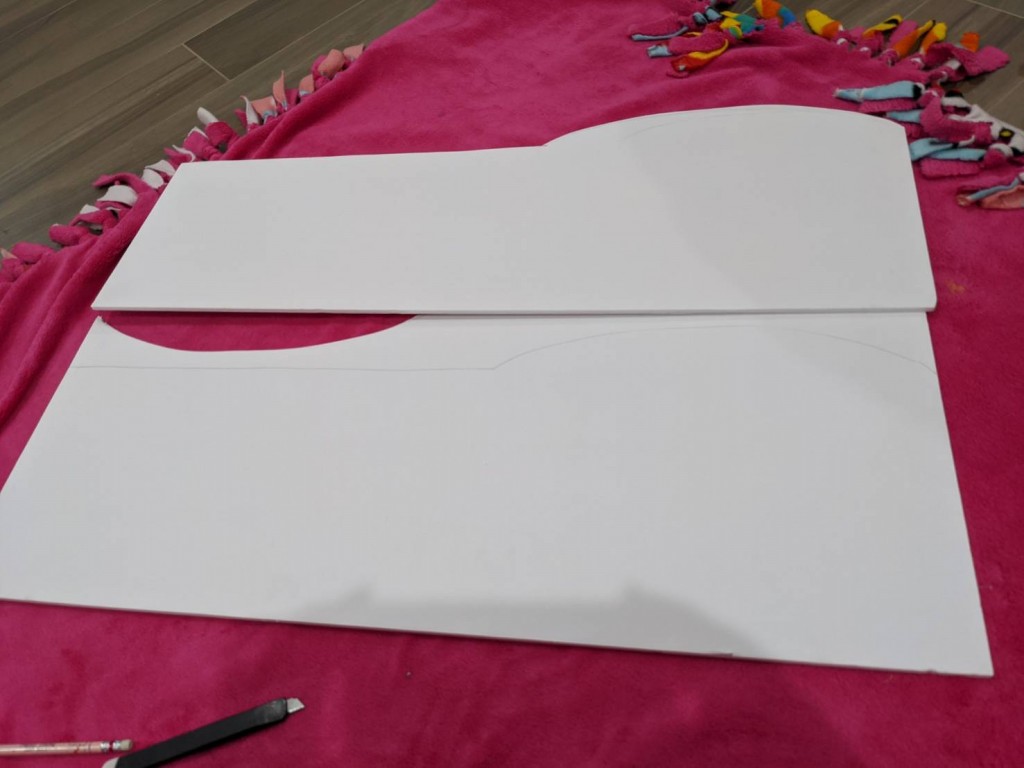
Here are the front side panels. I did one side first and then used that one to trace the second. I used the entire length of my foam board at first. I knew I wanted to cut it down later as much as possible because the front side panels will end up sticking out behind the child when he’s standing up and I didn’t want it protruding too much.
The hood is curved so the front of the panel is curved. Now that I’m done, I wish I had the sense to just cut it straight down at an angle. It would have been so much easier and it would have looked fine. I found that it’s so much harder to work with the curved pieces.
*Learn from my mistakes* I initially made the length of the hood way too long and the costume flopped all around my son’s shoulders. I later cut off the front of the hood to fix my mistake. To avoid this, for the length of the hood, you want to make it maybe 2.5 or 3 times the depth of the child’s body so that there’s room, but not too much room.
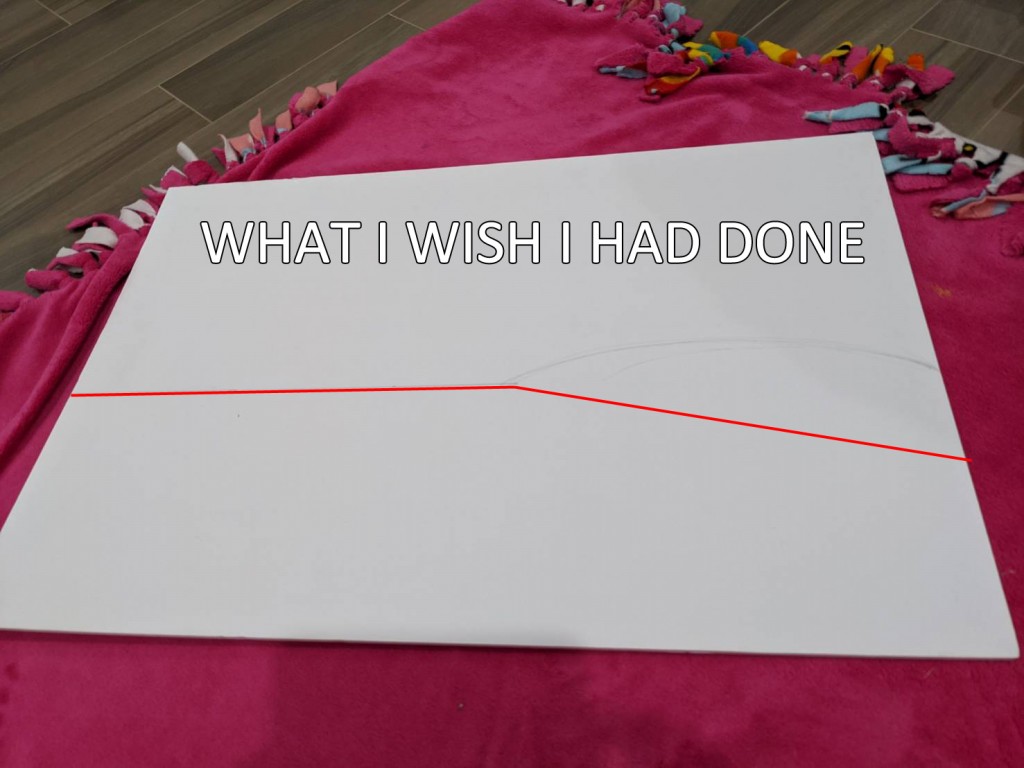
Hood


The hood is pretty straight forward. I matched the length of the hood to the length of the hood that I had already made on my front side panel. As far as the width, I just put the board up against my son and made sure it was wider than him and he had a little space on either side. The front part of the hood comes to a point (although if it were straight across, it wouldn’t be a big deal).
Next, you’ll need to cut an opening into the hood. I made the opening about 3 or 4 inches in on all sides. I only cut all the way through on the front three sides. On the last side at the back of the hood, I only scored underneath the board so that it would create a flap that could open up and out.
I also scored several lines on top of the hood so that it would be easier to bend into a curve.
*Learn from my mistakes* I made the opening way too big and his whole body would come right through the opening. I later added more foam pieces to the opening to make it smaller. Learn from me and make sure the opening is big enough to fit their head but not big enough that their shoulders would fit through too.
Front Bumper
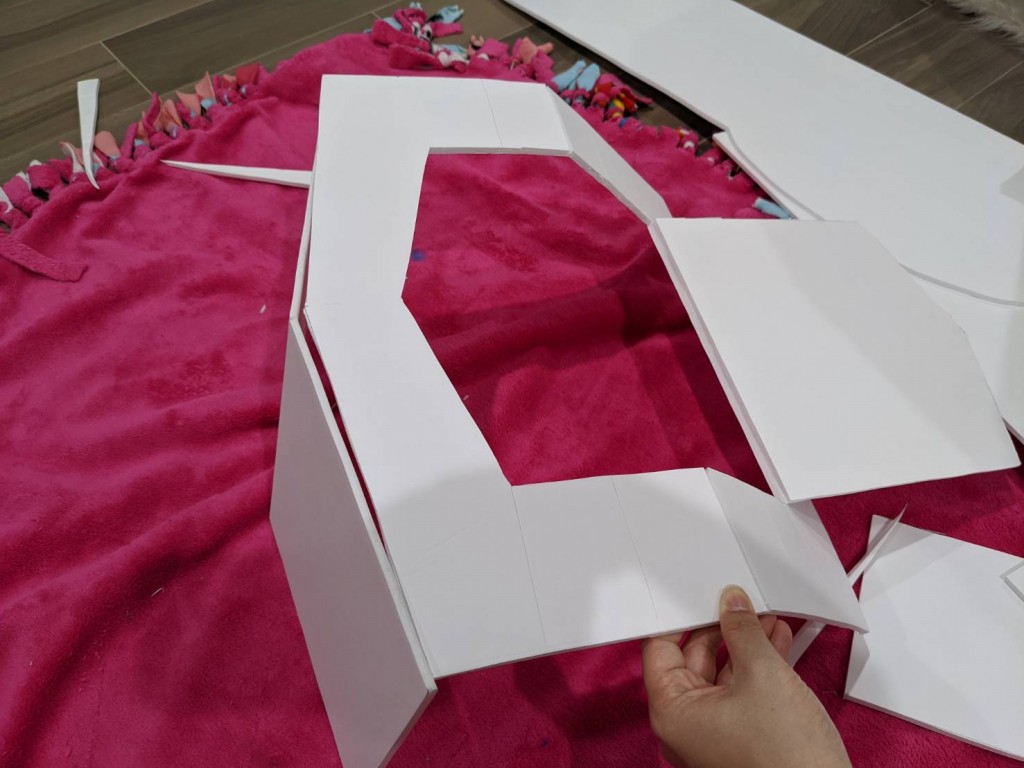
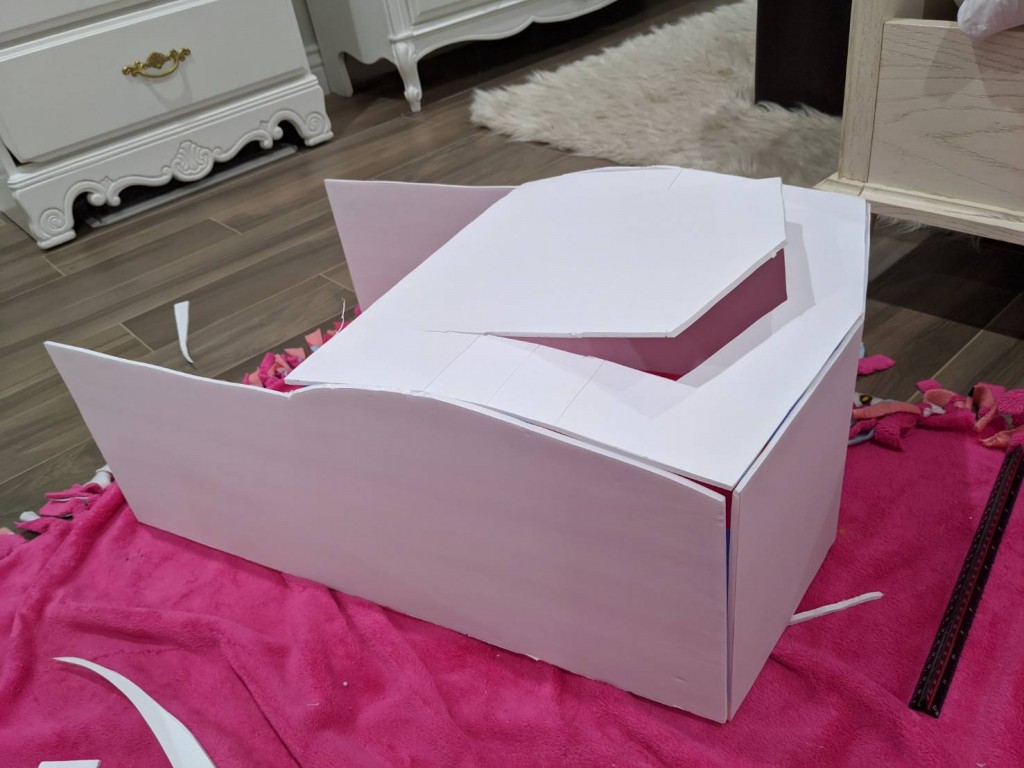
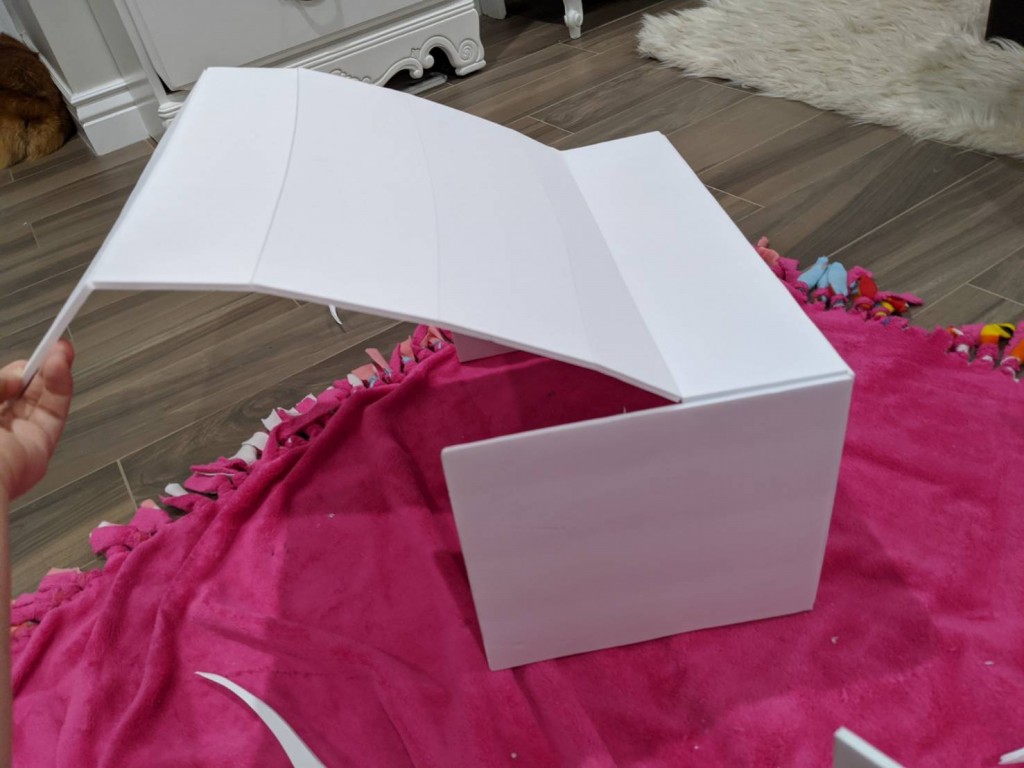
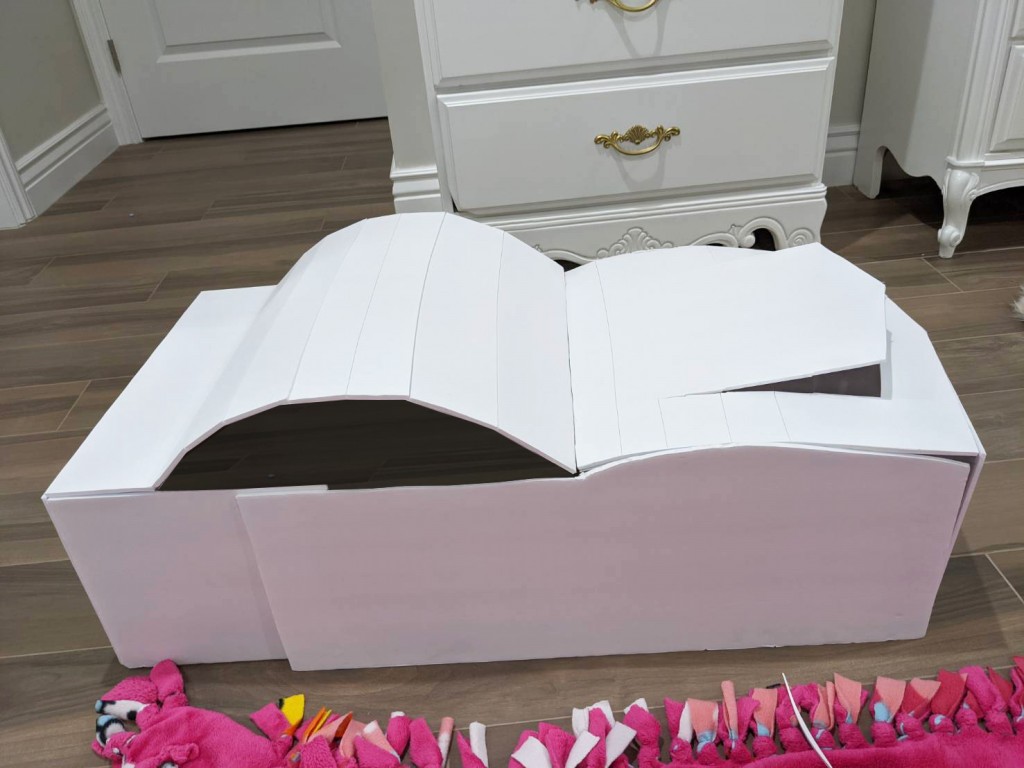
The front bumper is pretty straight forward. The width will be the same as the hood. As for the height, I just made sure it was high enough that it would cover my son’s chest, arms, and head when he laid down. It’s at this point that you can go ahead and attach all the pieces together that you have so far. In order to make the hood easier to bend, I made a bunch of score lines just to the top side of the hood. It was really hard to get it to lay right, which is why it would have been so much easier to make the hood straight down at an angle.
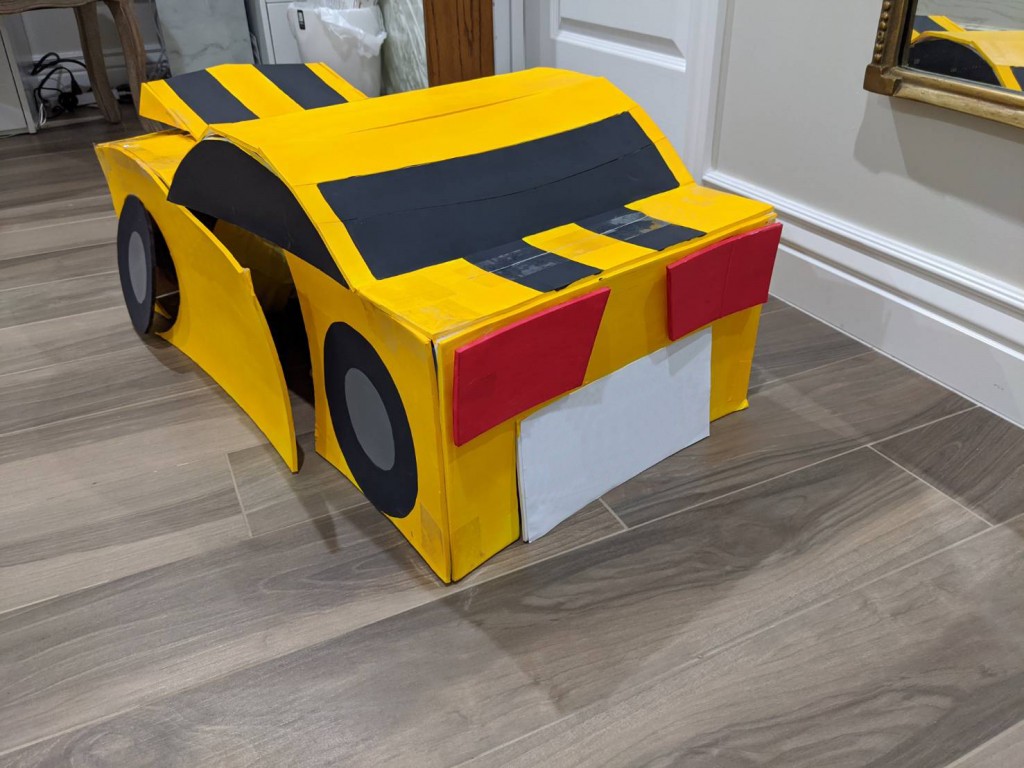
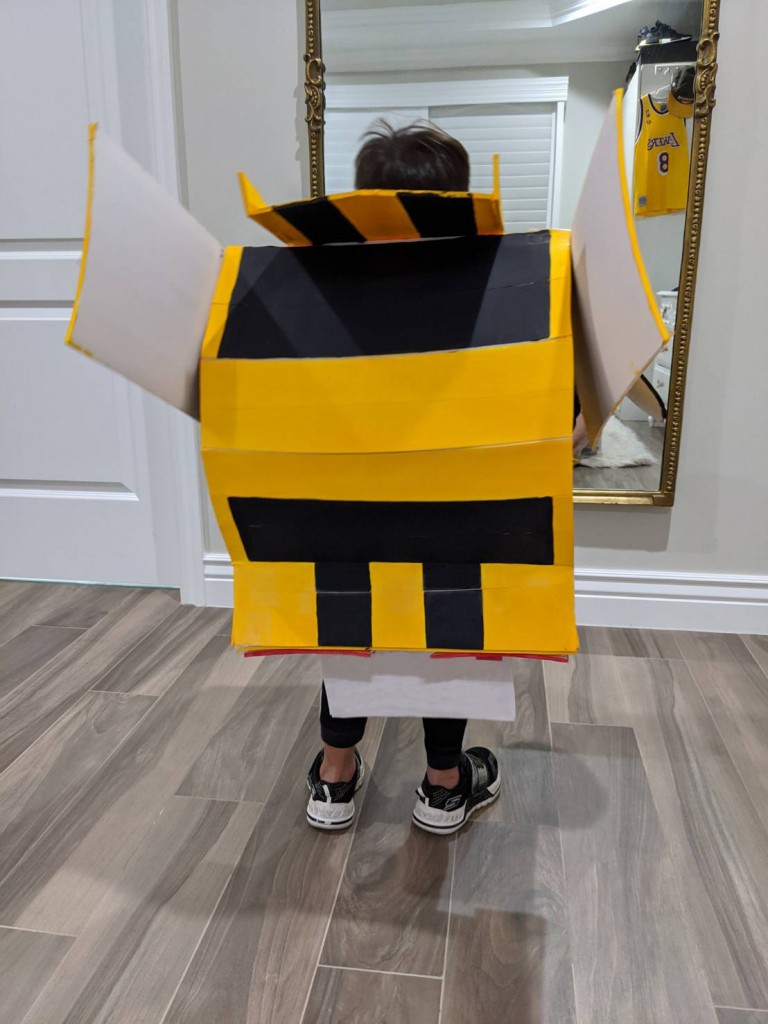
At this point I should point out that I used tape to put everything together just because I thought it was so much easier to work with. Because I was eyeballing everything, nothing was straight or fit perfectly, which would have made gluing a huge nightmare. As you can see from the second photo on top, there are some gaps between the pieces because not everything was flush and straight. There’s no way glue would have held things together for me. You could always cover the gaps with some paper before painting if you wanted to.
Rear Bumper, Trunk, and Roof
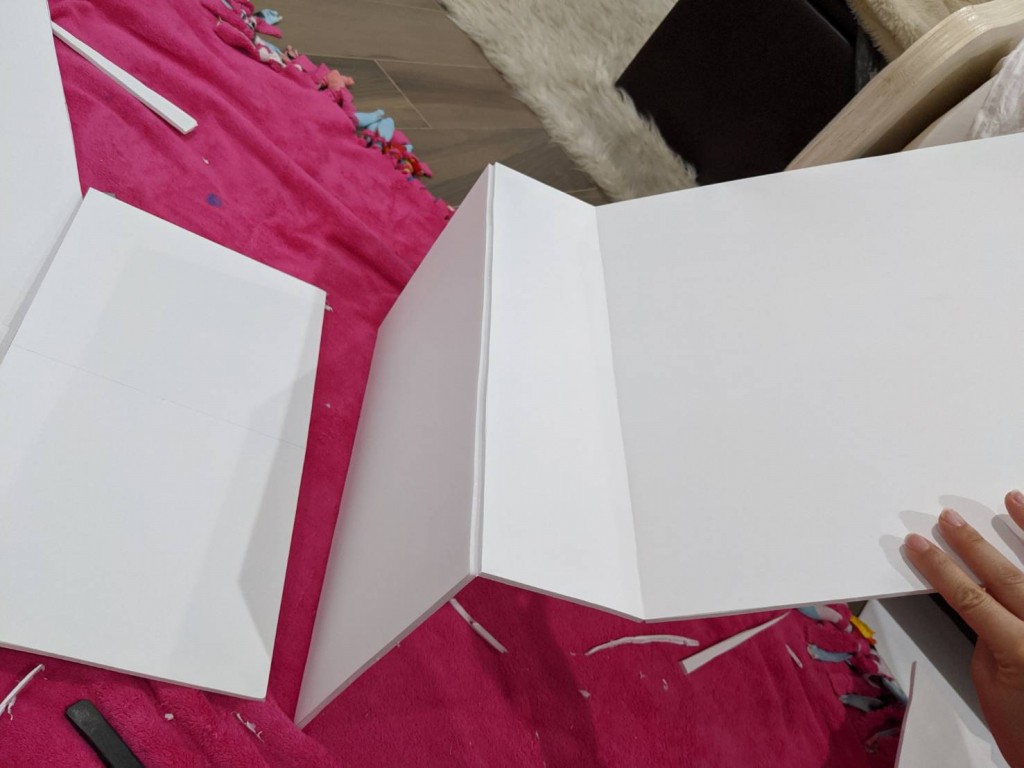
For the rear bumper, trunk, and roof, I kept it as all one piece and only scored it in certain places so that it would fold the right way. I used the entire length of my foam board. Starting on one end, I measured for the height of the rear bumper, which is the same as the height of the front bumper, and I scored it on the top of the board so it would bend down. Next I made a line for the length of my trunk, which I eyeballed about 4 inches. Here I scored underneath the board so that I could fold it up. The rest of the piece would be used for the roof of the car.
Rear Side Panels
For the rear side panels, I cut two pieces the same height as my rear bumper. For the width, I just eyeballed that and made it one inch longer than the height. I attached all the pieces together and then I made a bunch of score lines on the top of the roof so that I could bend it into a curve.
Attaching Front and Back Pieces
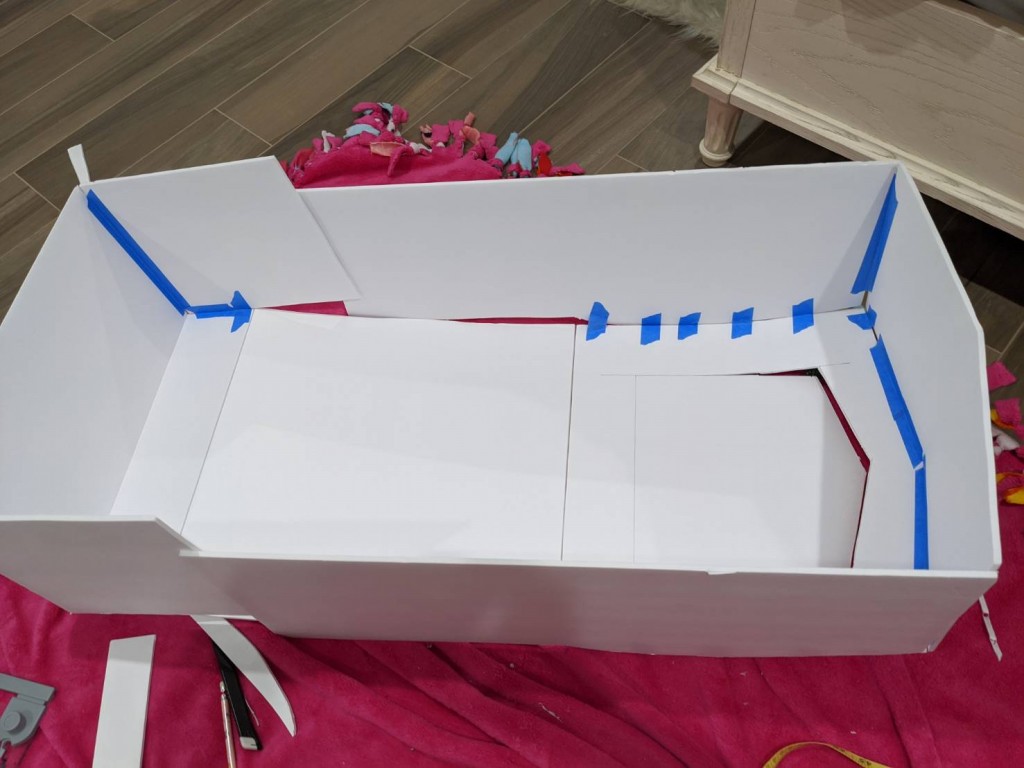
Here’s a picture of where I attached everything for the front and back pieces. I used gorilla tape because it’s strong. I also used the blue painters tape so you can see everywhere I’ve had to attach the pieces.
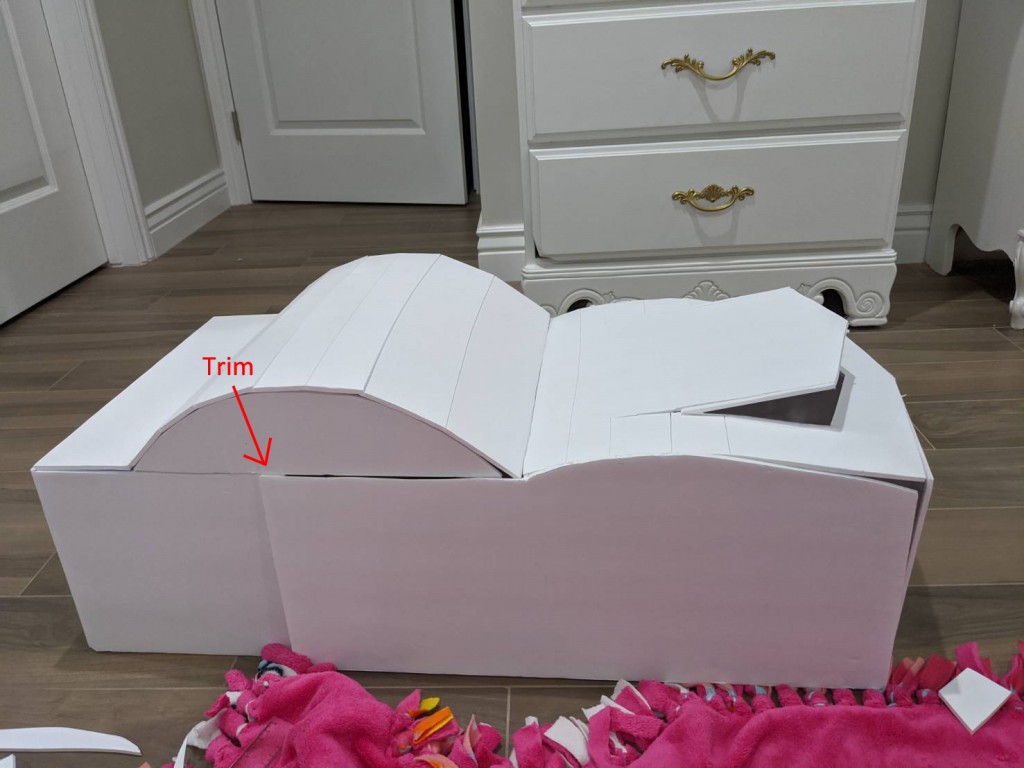
I placed both pieces together upright and played with the placement. The closer I put the piece together, the taller the roof of the car would curve. I ended up trimming off from of the length of the roof so that the length of the car wouldn’t be too long and the roof wouldn’t be too tall.
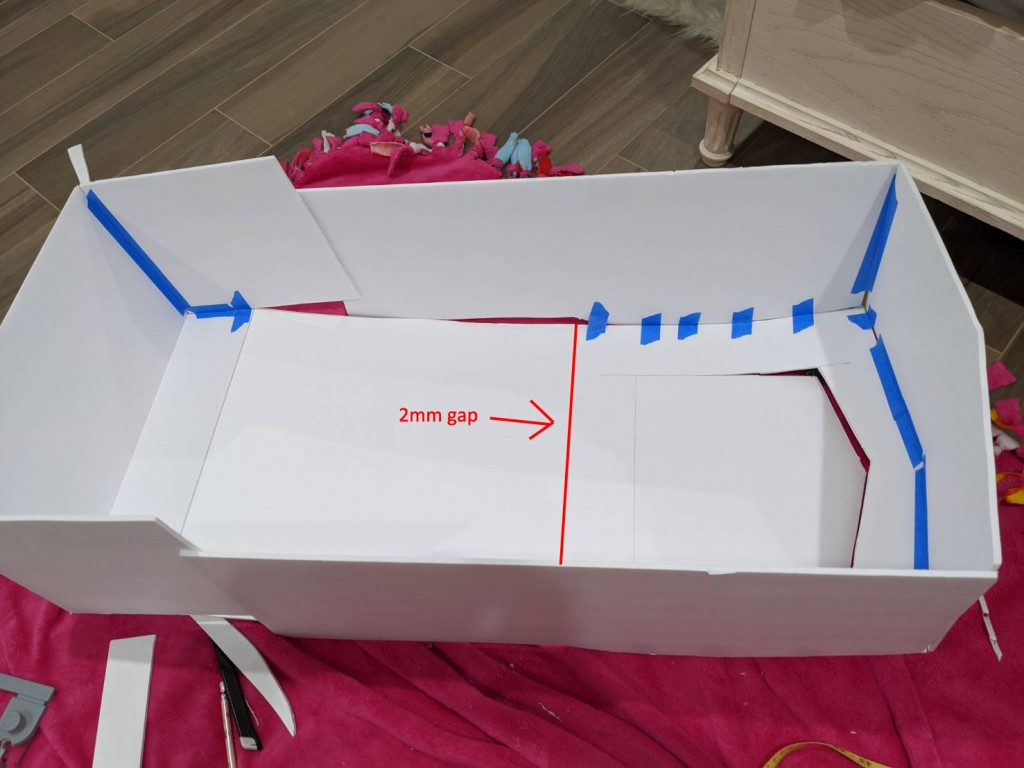
Where the roof meets the hood is the only place where the back and front pieces will be attached to each other. Here is where you want to tape the pieces together but leave about 2 mm between the two pieces. This leaves room so that the roof can bend up and curve but also bend back down when the while the child is transforming from car to robot.
Add Windows
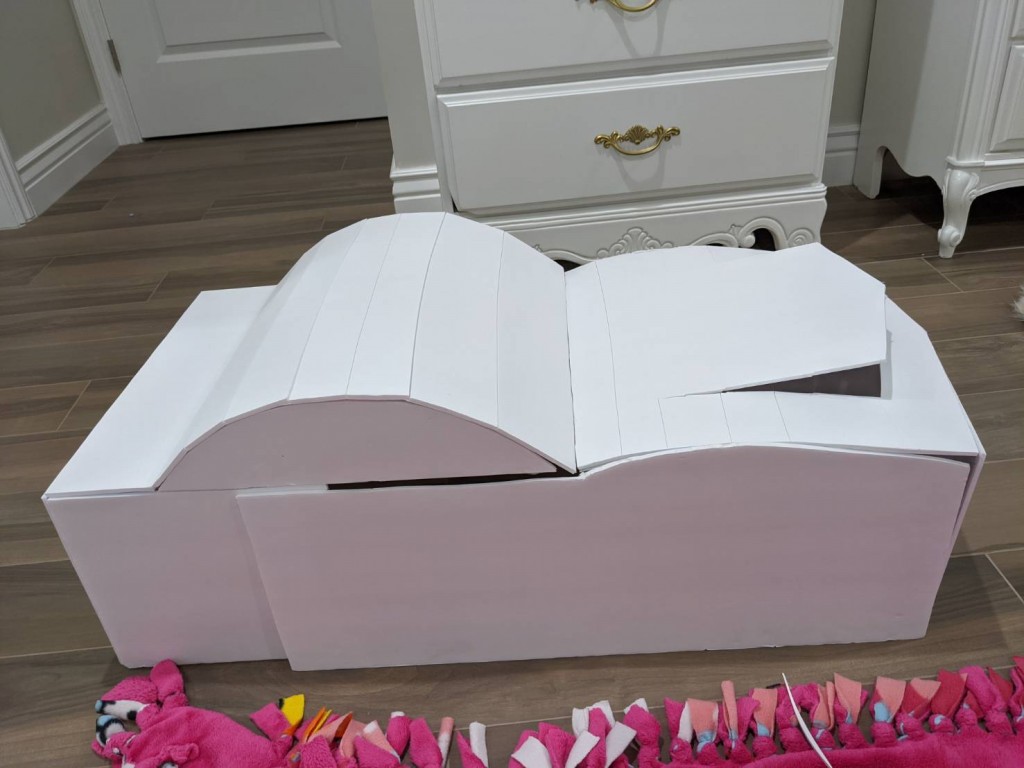
Add window pieces to the sides of the roof.
Test Costume
*Learn from my mistakes* I actually didn’t test my costume until much later, but looking back now, this is the perfect time to test it out. Once you attach the windows, your roof will be able to stay in place on its own. That’s why this is the point where you want to try the costume on your child to make sure everything it working correctly and make any adjustments or changes if needed.
Now that the front and back pieces are attached, I trimmed off as much as I could from the side panels.
Complete the Hood
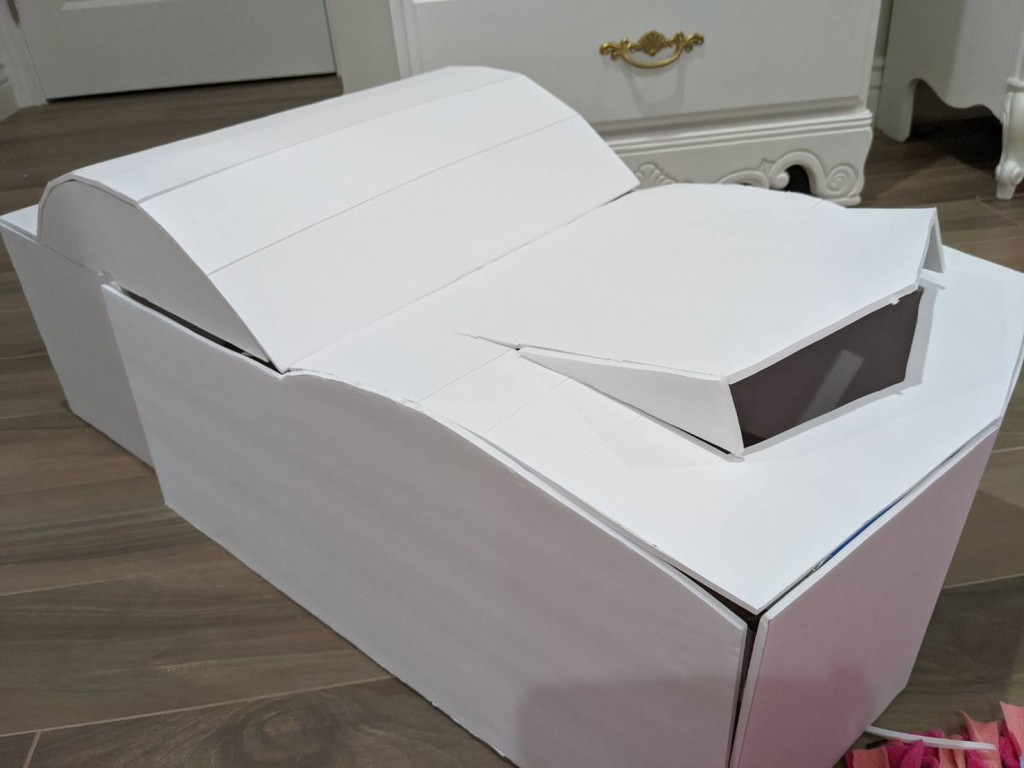
I added two triangular pieces to the hood opening so that it would stay open a little even when closed.
Draw and Cut Wheels
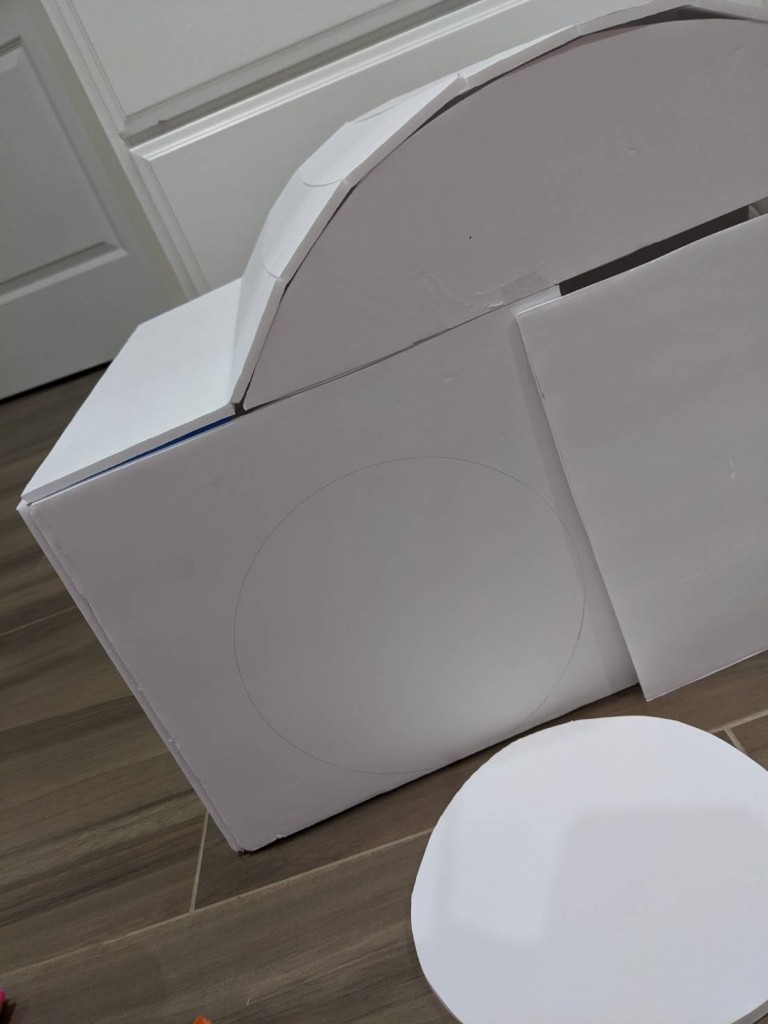
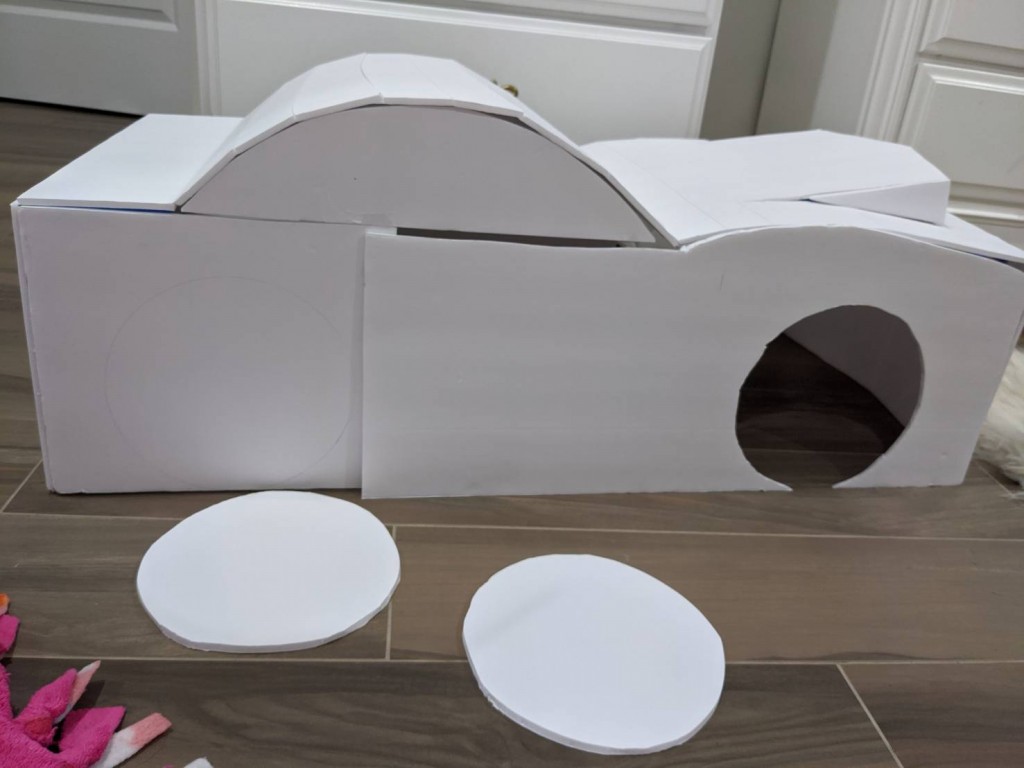
For the wheels, I found a bowl that I thought would be a good size for the car and used it to trace circles. For the back wheels, I’m just going to paint it because the side panels would end up bumping into the wheels if they were 3D. The front wheels were traced and cut out because that’s going to be the armholes for when my son transforms into a robot. Be sure to cut carefully because you’ll be keeping the cut-outs and reattaching later.
Paint
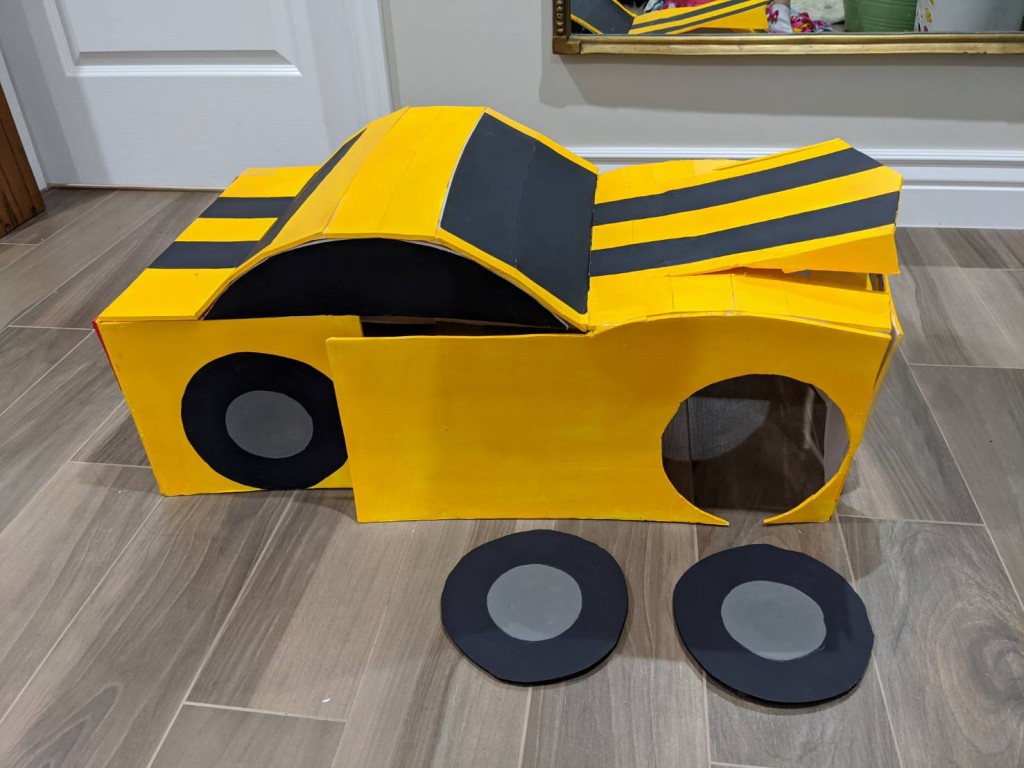
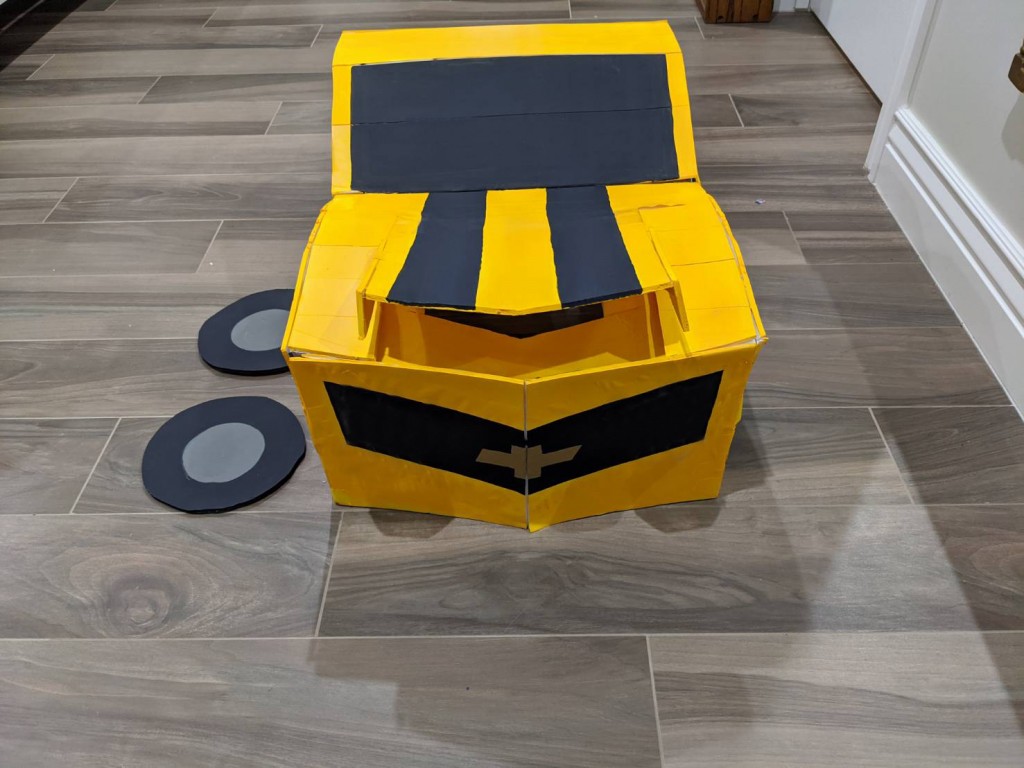
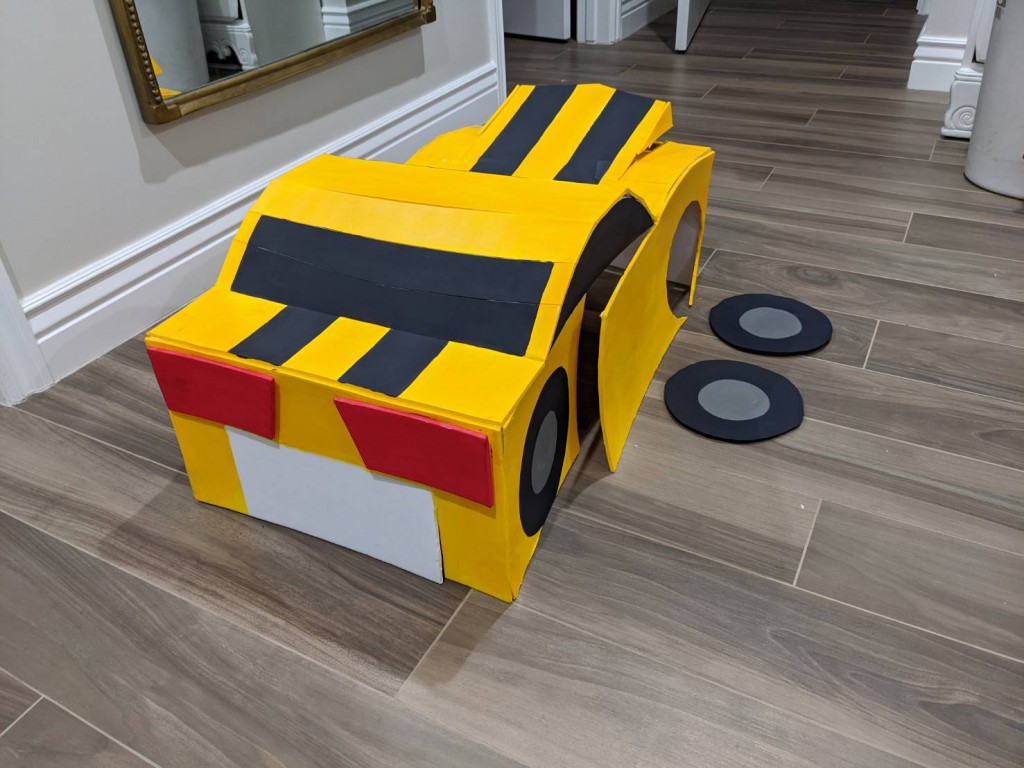
Before painting I drew in the details in pencil to make it a little easier. Also, you don’t have to, but if you want it to look a little cleaner, this is where you want to fill in any large gaps between your pieces before painting.
Even though you can see some of the underside of the car, I opted out of painting the inside.
I should also point out that it was at this point that i decided to cut out a flap for a license plate. This would allow for my son’s legs to come through and the back part of the car would lay more flat when he was upright.
Attach Headlights
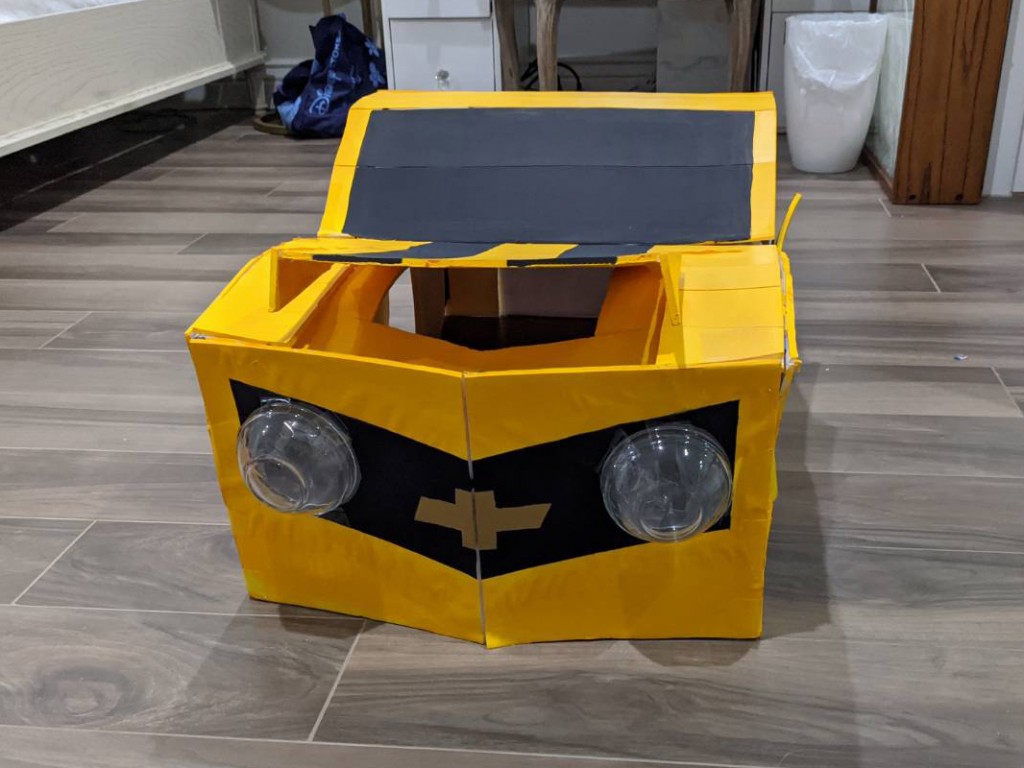
This is the point where I had my son try out the costume and I found the problems I had with the hood and hood opening being too big. After fixing those mistakes, I found that the back part of the costume was really heavy and pulled the hood of the car at an upward angle. To fix this, I needed to make the front of the car heavier. I found a solution by adding headlights to the car. This step not only adds a 3D detail to the car but also adds the much-needed weight. I used two glass bowls from Dollar Tree. I originally went there to find battery-operated tap lights that I have seen there before but they were sold out. You can use anything that’s round and has a good amount of weight to them and is easy to attach. I used E6000 and Gorilla tape to attach the bowls.
Attach Front Wheels
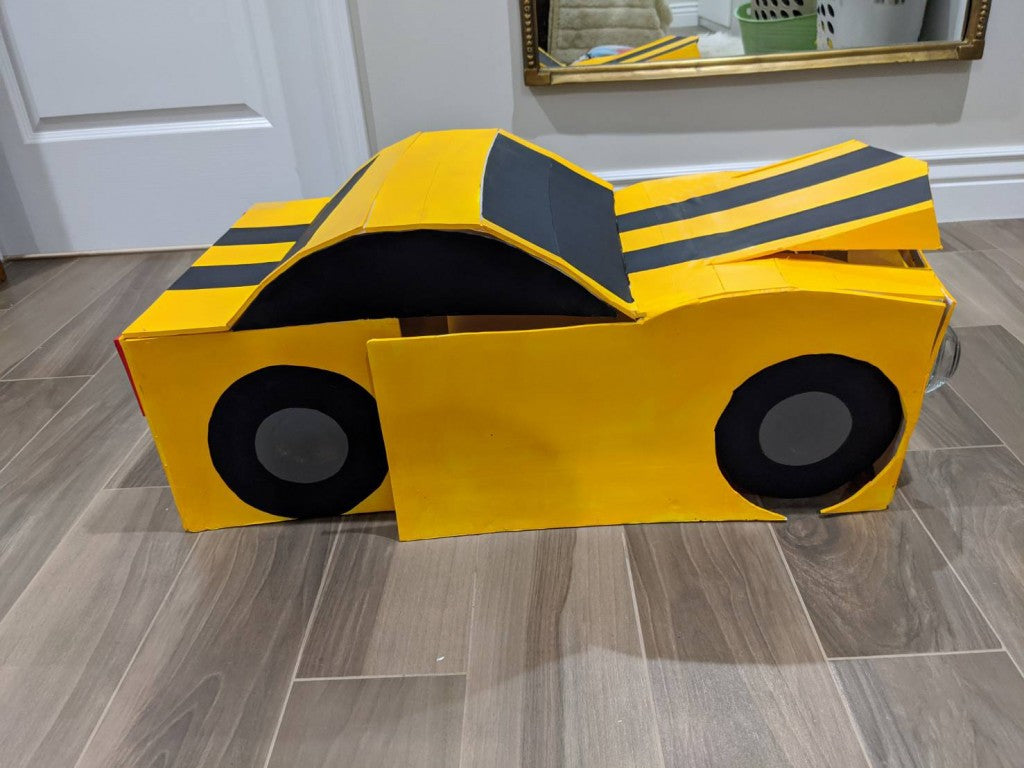
I attached the wheels to the arm hole with some tape on the inside and only at the top. This will allow the wheels to swing in when my son transforms into the robot. Be sure tape the wheels a few millimetres away from the car to allow the wheels to swing in and out.
Finishing Touches
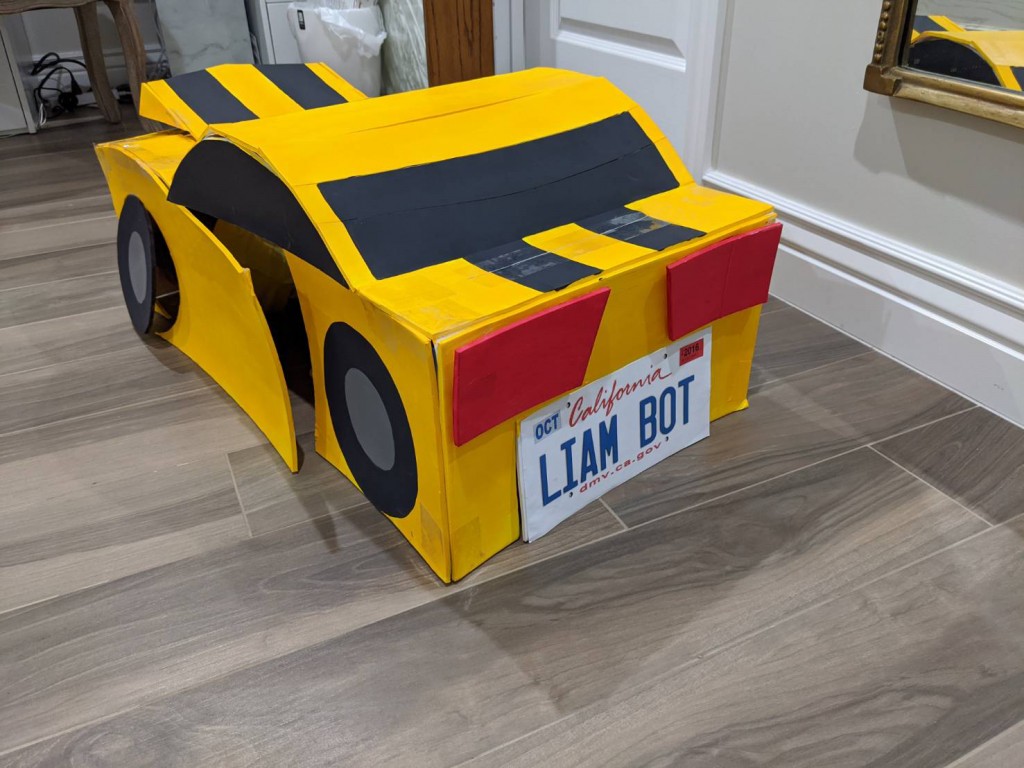
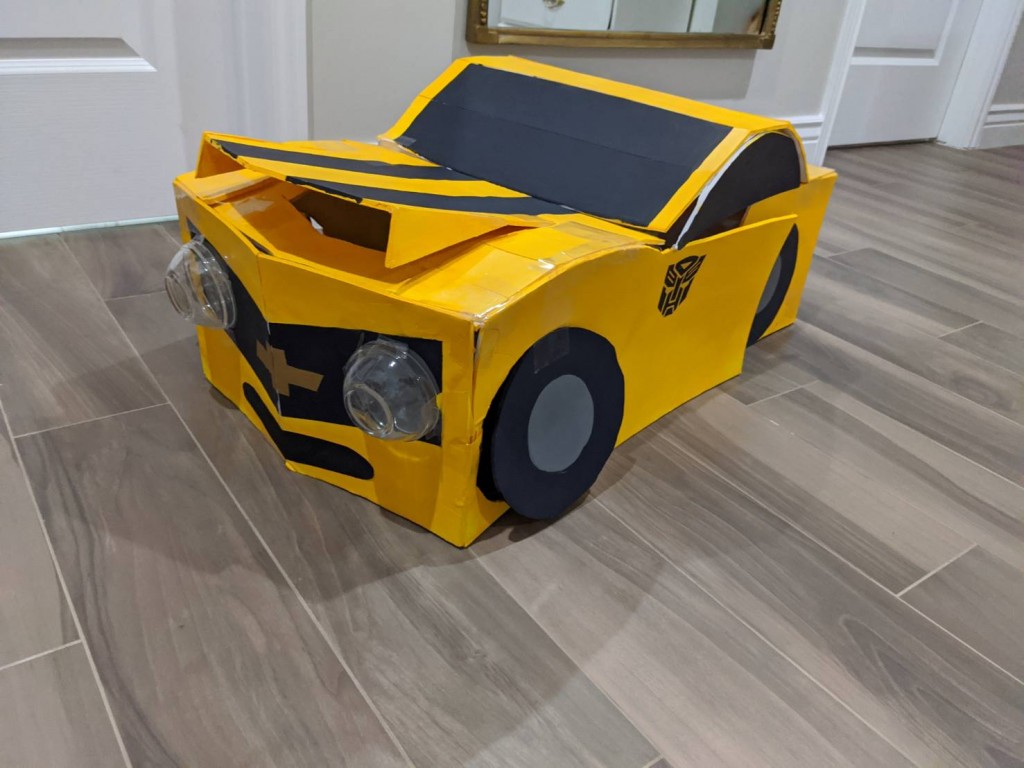
At this point, your costume is completely done. But because I love small details, I decided to take it a step further. I designed a customized license plate and printed it out. I even used my son’s birth month and year of birth for the registration stickers. Next I found the Transformers logo online, put a yellow background behind it and printed that out as well. I glued all my printouts to the car.
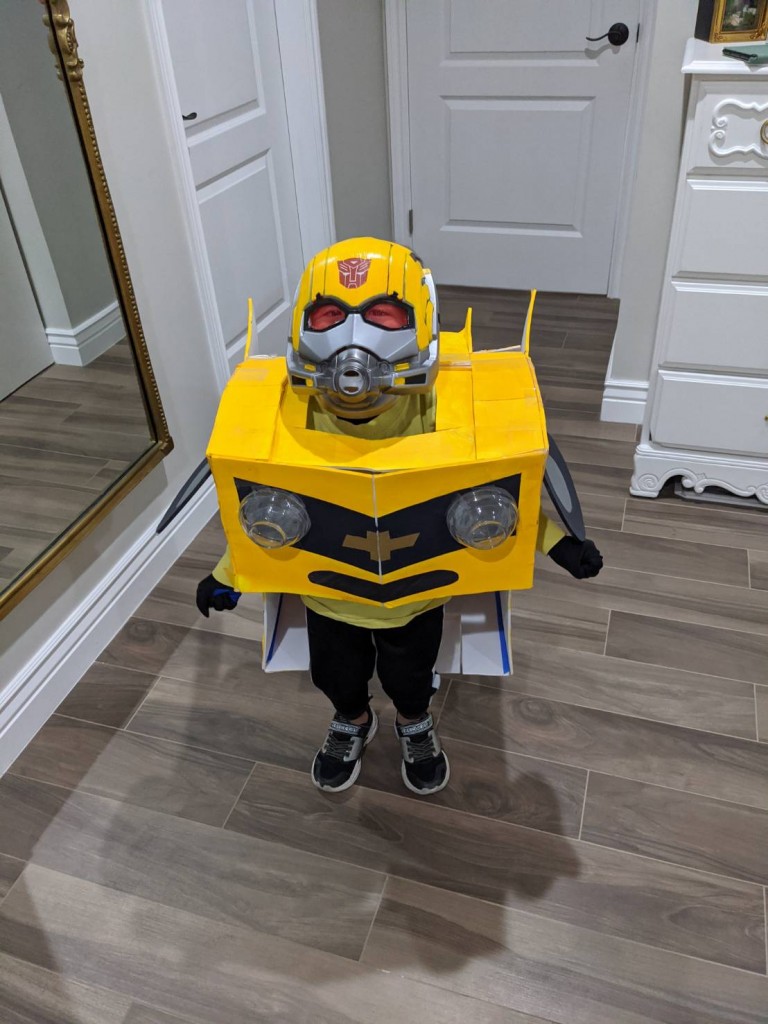
I also wanted my son to have a mask and gloves for when he transforms into Bumblebee but we were sadly sold out of the Bumblebee Mask. Instead, I painted this Ant-Man mask and it came out great. I also used a pair of these toddler gloves so that my son’s hands would be covered.
Final Thoughts
That concludes my DIY Converting Transformers Bumblebee Costume guide. Even without measurements or going off of any guide myself, I didn’t find this project to be too difficult. It was a little bit confusing during some points and time consuming (about 6 hours total), but I could definitely do it again. The best part of this whole thing? It only cost me $9 to make this entire thing! The only things I had to buy were the four foam boards ($4), box cutters ($1 for a pack of three), 3 tubes of paint ($3), and the headlight bowls ($1 for a pack of 4) and all were found at Dollar Tree. This project was so simple and cheap that I may end up making another costume for my daughter.
Lisa
Lisa plays the role of the Fairy Godmother on the Pure Costumes team.
Latest posts by Lisa (see all)
- DIY Wedding Photobooth - January 11, 2021
- Disney Cars Party Ideas - October 13, 2020
- COVID-19-Appropriate Costumes - October 8, 2020
